Small Kitchen Organization Ideas That Actually Work (Budget-Friendly + Easy)
In this post you’ll get…
In this post you’ll get a simple, budget-friendly way to organize a small kitchen so it looks tidy and stays easy to maintain. You’ll learn quick wins you can do today, then a step-by-step setup for counters, cabinets, drawers, under-sink storage, and the fridge—using practical organizers that solve real small-kitchen problems (without expensive renovations).
Quick wins (do these first)
- Clear one counter completely and only put back daily-use items
- Create 3 zones: cooking, coffee/snacks, cleaning
- Add one “drop zone” bin for random items you’re sorting later
- Use vertical space: shelf risers, under-shelf baskets, stackable bins
- Contain categories: one bin per category (snacks, baking, pasta, etc.)
- Use drawer dividers so utensils stop mixing together
- Keep heavy items at waist level (easier access, less chaos)
- Separate backstock (extras) from everyday items to avoid duplicates
- Do a 5-minute nightly reset: dishes, wipe, return items to bins
Step-by-step small kitchen organization (with photo placements)
Step 1: Take a “before” photo + choose 3 kitchen zones
Before you change anything, take a quick “before” photo. It makes it easier to see your progress and helps you keep your setup consistent as you organize.
Now choose your zones. In a small kitchen, the biggest problem is not storage—it’s items living too far from where you use them.
The 3 zones that work in almost every small kitchen:
- Cooking zone (near the stove): oils, salt, spices, utensils, pans
- Cleaning zone (near the sink): soap, sponges, towels, trash bags
- Grab-and-go zone (near the fridge/door): snacks, bottles, lunch items

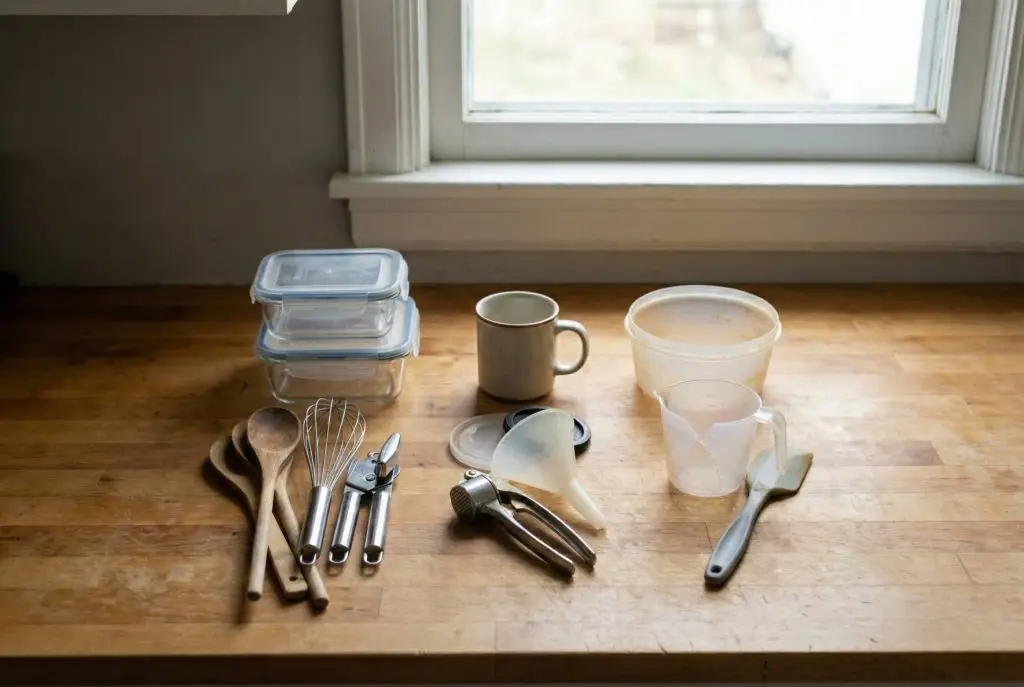
Step 2: Do a fast “Keep / Move / Donate” sort (15 minutes)
Set a timer for 15 minutes. You’re not trying to be perfect—just decisive.
- Keep: used daily or weekly
- Move: used monthly/seasonally (holiday trays, specialty gadgets)
- Donate/recycle: duplicates, broken items, things you never use
Small-kitchen rule: If you use it less than once a month, it shouldn’t take a prime cabinet spot.
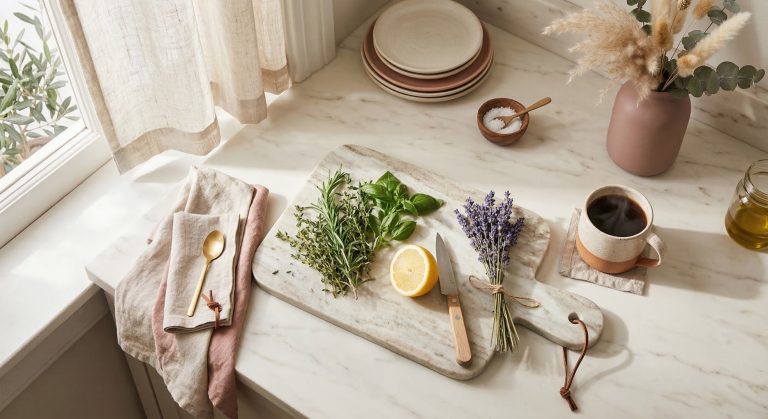
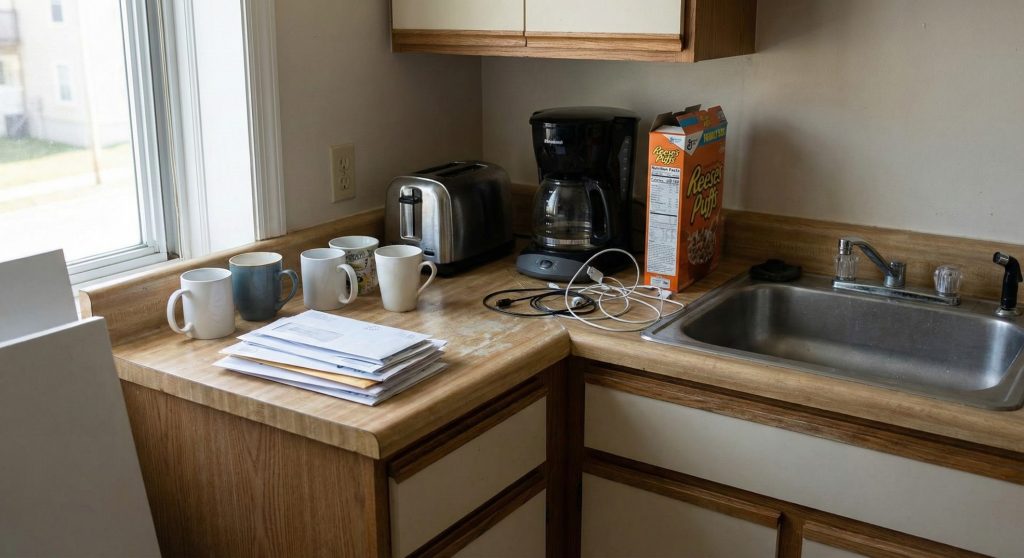
Step 3: Clear the counters and “earn” items back
Counters are visual space. In small kitchens, too many items on the counter makes everything feel messy.
Keep out only if you use it daily:
- Coffee machine or kettle (if truly daily)
- Knife block or magnetic strip (choose one)
- One utensil crock
- Soap area essentials
Move off the counter:
- Extra mugs/glasses
- Bulk snack boxes
- Rare-use appliances (waffle maker, slow cooker) unless used weekly
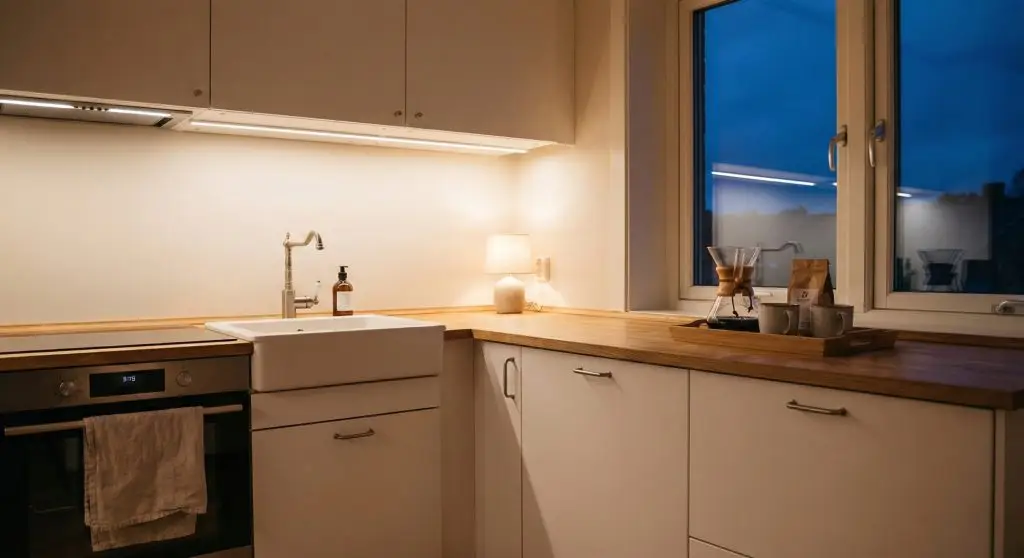
Pro tip: Use a tray to create one neat “station” (coffee or cooking oils). It looks intentional and is easy to clean around.
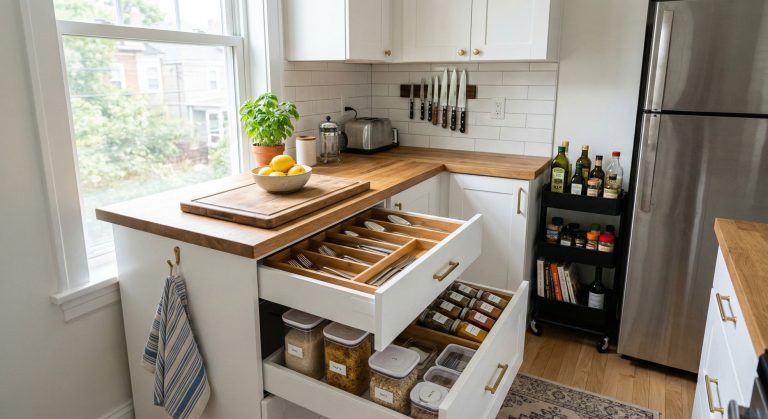
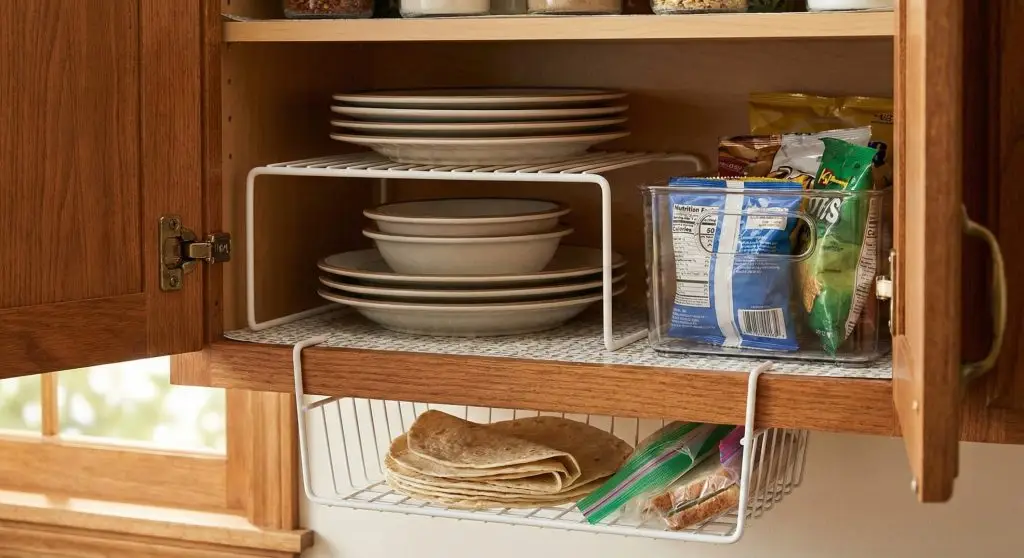
Step 4: Fix the #1 cabinet problem—wasted vertical space
Most cabinets waste space because items get stacked and hidden. The cheapest fix is going vertical.
Budget upgrades that work:
- Shelf risers for plates/bowls or pantry items
- Under-shelf baskets for wraps, napkins, tea
- Stackable bins for snacks, baking, packets
- Lazy Susans for oils, sauces, vitamins, coffee syrups
Start with the cabinet that annoys you the most.
Step 5: Create simple categories that match how you actually cook
Organization fails when categories are too complicated. Keep it simple.
Easy categories for a small kitchen pantry/cabinet:
- Breakfast
- Snacks
- Cooking basics (oil, salt, sauces)
- Pasta + rice
- Baking
- Cans + soups
- Backstock (extras)
Important: Keep backstock separate. If extras mix into daily bins, you’ll buy duplicates.
Step 6: Make drawers “no-mess” with dividers
Drawers get messy because everything competes for space. Dividers fix that.
The 3 drawers that matter most:
- Utensil drawer: spatulas, spoons, tongs
- Prep drawer: measuring cups, can opener, peeler, scissors
- Wrap + bags drawer: foil, parchment, zip bags
Budget move: Use small boxes you already have first, then upgrade later.

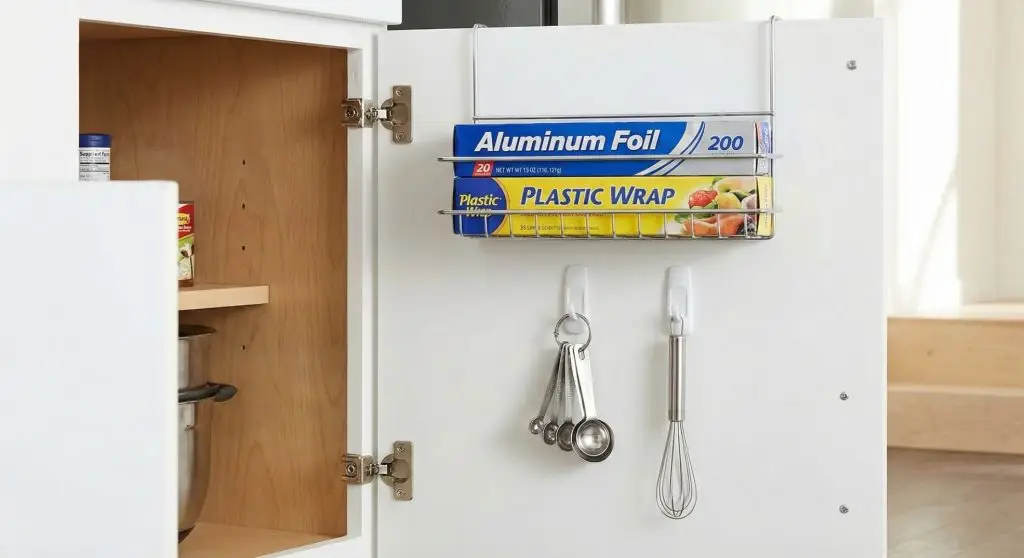
Step 7: Use door + wall space (the secret weapon in small kitchens)
In a small kitchen, doors and walls are free real estate.
Inside cabinet doors are great for:
- Measuring spoons on hooks
- Wraps (foil/parchment) with a door organizer
- Cutting boards/baking sheets with a rack
- Under-sink cleaning tools (small caddy)
Walls can hold:
- Magnetic knife strip
- Hook rail for tools
- Pegboard (if you like DIY)
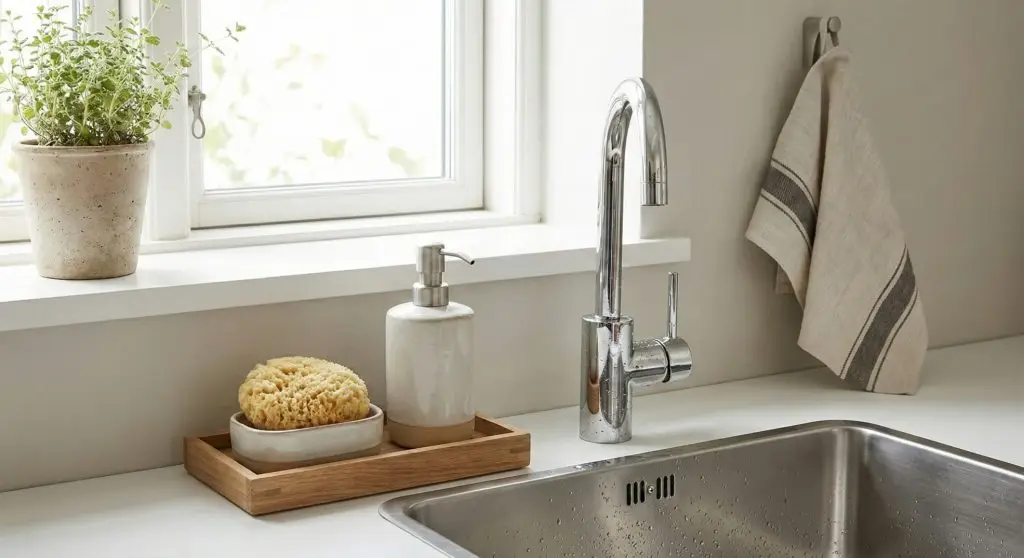
Step 8: Set up the sink area so it’s effortless to keep clean
If the sink zone is messy, the whole kitchen feels messy.
Simple sink setup:
- Soap dispenser
- Sponge holder (so sponges dry)
- Small tray to catch drips
- Dedicated spot for dish towels
Under-sink setup:
- One bin for “daily cleaning” (spray, cloths)
- One bin for “extras” (trash bags, dishwasher tabs)
- Optional lidded bin for odd items
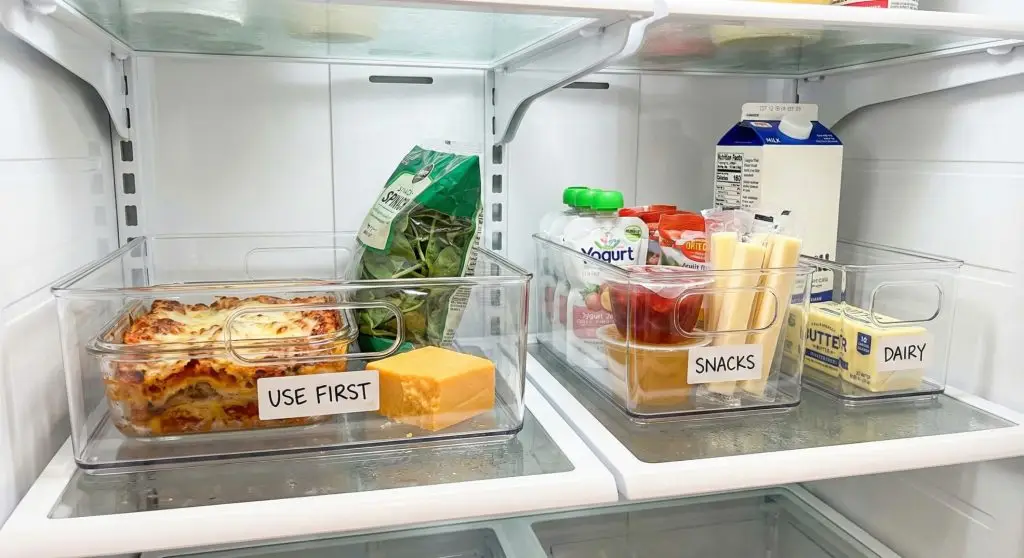
Step 9: Organize the fridge like a mini pantry (so food doesn’t get wasted)
Small fridges get overstuffed fast. Simple zones help you see what you already have.
Easy fridge zones:
- Top shelf: ready-to-eat leftovers
- Middle: daily items/dairy
- Bottom: raw ingredients (use a tray if needed)
- Door: condiments
Game-changer: a clear “use first” bin for leftovers and items that expire soon.
Step 10: Maintain it with a 5-minute nightly reset
This is what keeps your kitchen organized long-term.
Every night (5 minutes):
- Put dishes away / into dishwasher
- Wipe counters
- Return items to bins/zones
- Quick trash check
- Reset your coffee/snack station
Weekly (10 minutes):
- Empty the “drop zone” bin
- Straighten one shelf and wipe crumbs
- Check the fridge “use first” bin
Shopping list / tools list (budget-friendly essentials you can find on Amazon)
You don’t need to buy everything on this list. Start with 2–3 basics that solve your biggest pain point (counters, cabinets, drawers, or pantry). Most of these organizers are easy to find online—including on Amazon—so you can compare sizes, read reviews, and choose what fits your space and budget. (If you decide to add product links later, this section is a natural place to include them in a helpful way.)
Must-haves (best value for small kitchens)
- Shelf risers (for cabinets/pantry to double vertical space)
- Clear storage bins (2–6 medium bins for snacks, packets, baking, etc.)
- Drawer dividers (adjustable dividers or simple trays for utensils)
- Lazy Susan turntable (one large or two small for oils, sauces, and spices)
Nice-to-haves (big payoff once the basics are done)
- Under-shelf baskets (great for wraps, napkins, tea, snack bars)
- Over-the-cabinet door organizers (for foil/parchment or cutting boards)
- Stackable can risers (helps you see cans and prevents “lost” food)
- Spice organizer (drawer insert or tiered shelf—whichever fits your layout)
- Slim rolling cart (perfect if you have a narrow gap beside the fridge or cabinets)
Cleaning zone helpers (to keep the sink area neat)
- Sponge holder or sink caddy (so sponges dry and don’t sit on the counter)
- Small tray for the soap area (catches drips and makes wiping easy)
- Under-sink bins (simple bins work great for daily cleaners vs. backups)
Tip: These organizers come in lots of sizes and styles (you can find plenty of options on Amazon), so choose what fits your cabinet measurements and how you actually use your kitchen.
FAQ
How do I organize a small kitchen with no pantry?
Turn one cabinet into a “mini pantry” using bins. Use 4–6 categories (snacks, breakfast, pasta, baking, cans, backstock). Add a shelf riser so you can stack without losing items.
What’s the cheapest way to make a small kitchen look organized?
Clear the counters and contain categories. A tray station + two matching bins can make the entire kitchen look instantly calmer.
Should I use baskets or clear bins?
Clear bins are best for food because you can see what you have. Baskets are great for towels, napkins, and non-food items.
How do I keep drawers from getting messy again?
Give each drawer one job and use dividers. Don’t let “random items” spill into your utensil drawer—use a small lidded bin instead.
How many items should stay on the counter?
Try to keep it to 5–7 items max (including soap). If you need more, group items on a tray so the counter still looks tidy.
Do I need labels?
Not at first. Labels help most when multiple people use the kitchen, or when you have lots of similar bins.
What if I rent and can’t drill holes?
Use over-the-door organizers, adhesive hooks, tension rods under the sink, and stick-on clips for cords. You can still get a big upgrade without permanent changes.
Final thoughts
If your small kitchen is driving you crazy, start with just one cabinet and a counter reset today. Once you set up a few simple zones and categories, your kitchen will feel bigger, cleaner, and easier to use—without spending a lot.
If you want, tell me your biggest problem area (counters, pantry, drawers, under-sink, fridge), and I’ll customize a simple plan for your layout.