How to Design a Low Deck: Ground-Level Ideas for a Beautiful Spring Backyard
Introduction
I’ll be honest with you — I never thought a deck this low to the ground could change the way I actually use my backyard. I kept putting off the project because I assumed a deck needed to be elevated, railed, and complex to be worth the effort. Then last spring, I finally just did it. No rails. No stairs. Just a clean, flat platform sitting just a few inches above the soil, tucked into a corner of my yard that I’d basically ignored for two years.
It changed everything.
If you’re looking at your backyard right now thinking it needs something — a place to put a table, a spot to actually sit and enjoy the space — a low deck might be exactly what you need. It’s one of the most beginner-friendly outdoor projects you can tackle, it works with almost any yard size, and when you style it right for spring, it looks like something out of a magazine. This guide covers how I designed mine, what I’d do differently, and everything you need to plan yours from the ground up.
Why a Low Deck Is One of the Smartest Spring Backyard Projects
Before I get into the steps, let me explain why I think a low deck — often called a floating deck or ground-level deck — beats a traditional elevated deck for most home backyards.
First, there’s no permit required in most areas as long as the deck stays below a certain height (usually under 30 inches from the ground — always check your local code). That alone saves you weeks of paperwork and often hundreds in fees.
Second, the build is genuinely manageable for someone with basic DIY skills. No complex framing, no digging deep post holes for tall supports, and no railing system to figure out.
And third — and this is the reason I love mine most — a low deck feels connected to the yard. It doesn’t sit above the garden. It sits within it. That relationship between the deck surface and the surrounding plants is what makes it feel so intentional and designed, especially in spring when everything is green and blooming around it.
Section 1: Planning Your Low Deck — Start Here Before You Buy Anything
The most important thing I learned: measure twice, plan three times, and only then go to the lumber yard.
Start by marking your deck footprint with stakes and string. Walk around it. Sit in the middle of it on a lawn chair. Ask yourself: does this actually match how I want to use the space? A deck for morning coffee and reading feels different from one for outdoor dining with four people.
What to figure out before you plan:
- Purpose — dining, lounging, container gardening, or a mix?
- Size — most low decks work well between 10×10 and 16×20 feet
- Sun exposure — where does morning vs afternoon shade fall?
- Drainage — the ground beneath needs to drain well or your deck will rot faster
I made mine a 12×14 rectangle, which fits a small dining table and two lounge chairs comfortably. In hindsight, I’d go one foot wider, but it works.
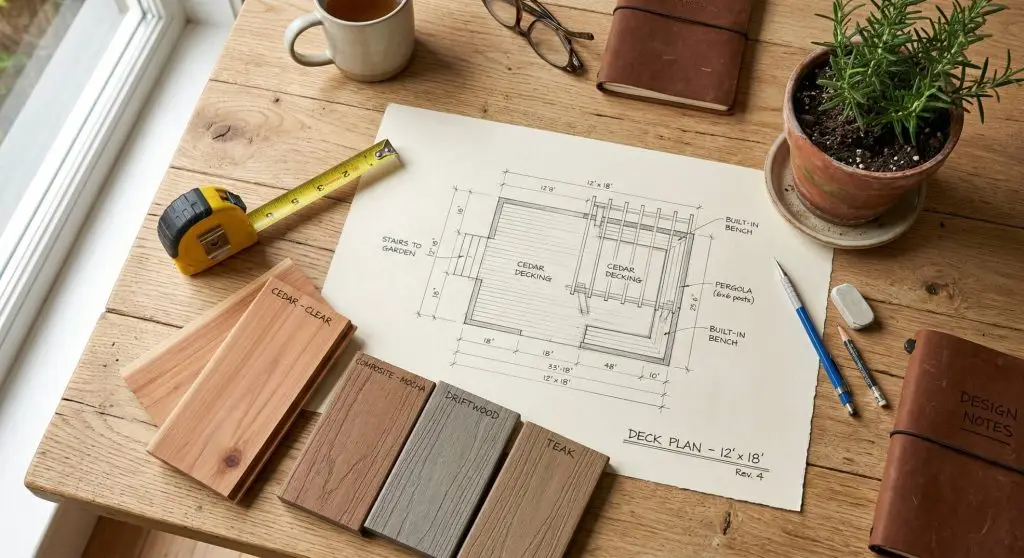
Section 2: Choosing the Right Materials for a Ground-Level Deck
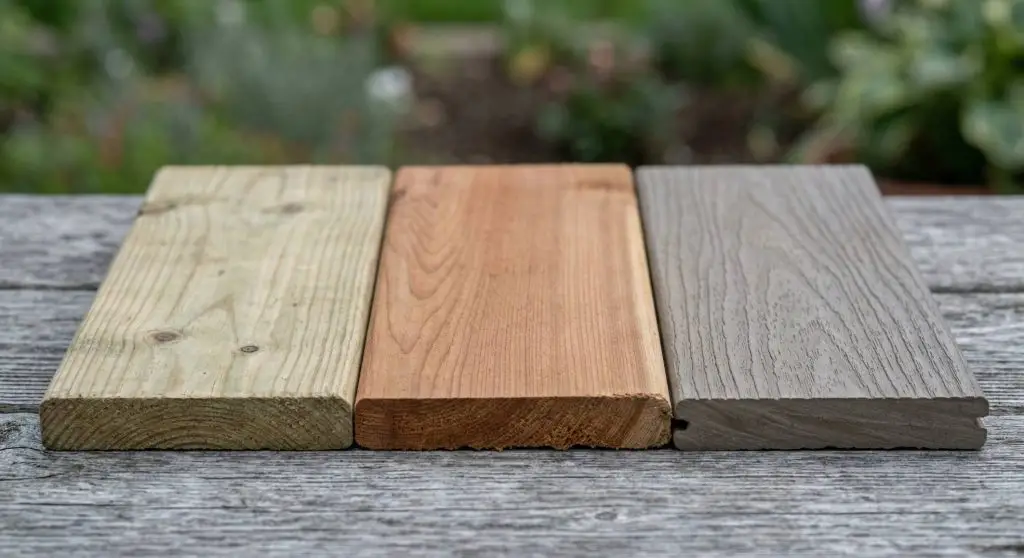
This is where your budget and your long-term maintenance tolerance will shape the decision. I went with pressure-treated pine because I was watching costs, but if I were doing it again, I’d seriously consider composite for the decking boards (the surface you walk on) and save the pressure-treated lumber for the subframe below ground level where no one sees it anyway.
Material options to consider:
| Material | Cost | Lifespan | Maintenance |
|---|---|---|---|
| Pressure-treated pine | Low | 15–25 yrs | Stain every 2–3 yrs |
| Cedar | Medium | 20–30 yrs | Occasional oil or stain |
| Composite decking | Higher upfront | 25–50 yrs | Very low |
| Tropical hardwood (Ipe) | High | 40+ yrs | Low with oil |
For a low deck close to the soil, I’d prioritize rot-resistance above almost everything else. The closer your deck sits to the ground, the more moisture it will encounter.
Section 3: What You Need — Tools and Supplies List
Here’s roughly what I gathered before starting. You don’t need all of this on day one — some of it comes into play later — but having the list ahead of time prevented multiple trips to the hardware store.
Tools:
- Circular saw or miter saw
- Drill and impact driver
- Speed square and carpenter’s level
- Measuring tape and chalk line
- Post hole digger or hand auger (for footings)
- Shovel and tamper
Materials:
- Deck boards (choose your material from above)
- Pressure-treated 2×6 or 2×8 for joists and beams
- Concrete deck blocks or tube footings
- Gravel or landscape fabric for ground prep
- Exterior deck screws (coated, not galvanized)
- Joist hanger hardware
- Ledger board (if attaching to a house)
- Sandpaper and exterior wood stain or sealer
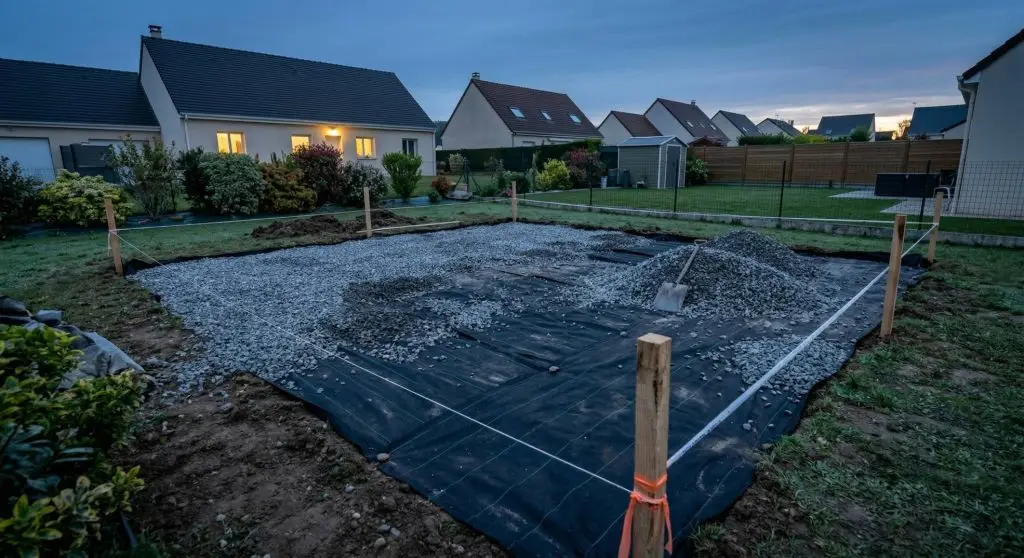
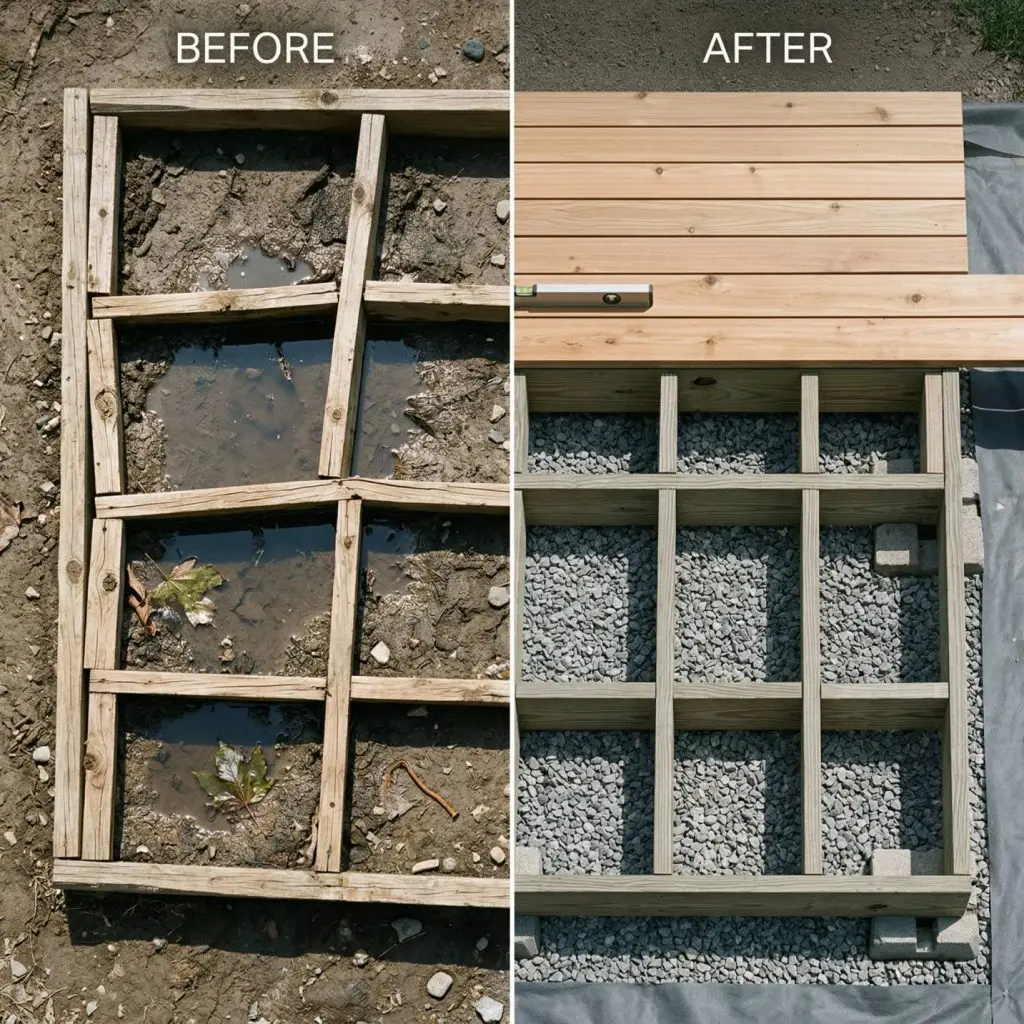
Section 4: Preparing the Ground — The Step Most People Rush
I made the mistake of rushing this part. The ground underneath your deck matters more than anything you put on top of it.
Step-by-step ground prep:
- Clear the area — Remove all grass, weeds, and debris from your deck footprint plus 6 inches on every side.
- Level the ground — Use a long 2×4 and a level to identify high and low spots. Dig down the high spots; fill low ones with compacted gravel.
- Lay landscape fabric — This suppresses weeds that would otherwise grow up through your deck over time.
- Add a gravel layer — 2–3 inches of crushed gravel promotes drainage and keeps your subframe off the damp soil.
- Set your footings — Concrete deck blocks (the precast kind that sit on the surface) work well for low decks. Space them every 4–6 feet following your joist layout plan.
Don’t skip the gravel. Seriously. I’ve seen decks that were beautifully built rot from below within five years because of poor drainage prep.
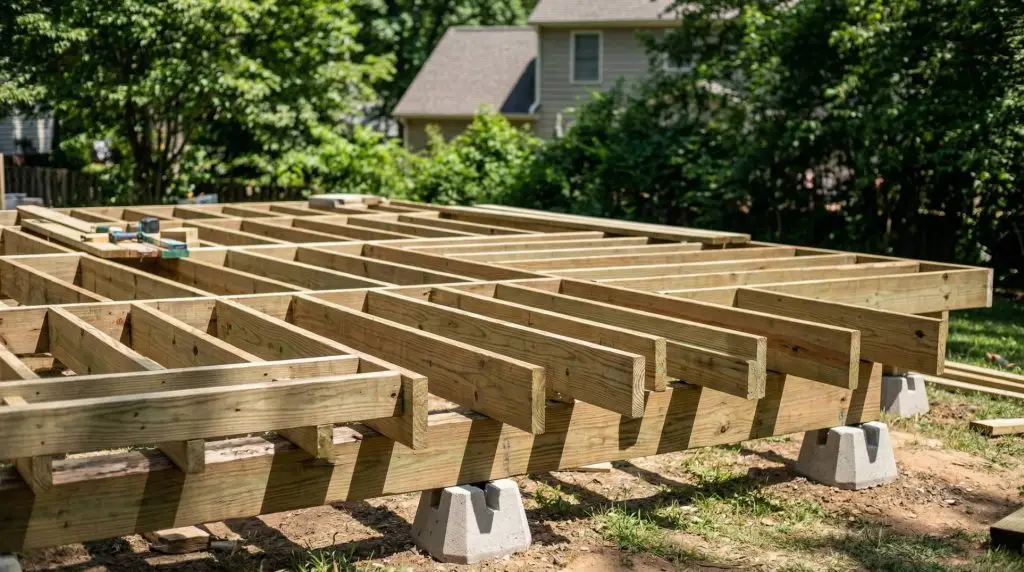
Section 5: Building the Subframe — Where the Deck Gets Its Strength
The subframe is the skeleton of your deck. Even though it lives under the surface where no one sees it, this is the part that determines whether your deck is solid or bouncy, straight or wavy.
Step 1: Install your beams Lay your outer frame beams across your concrete blocks first. Use a level constantly. Even a small slope here will become very obvious once boards go down.
Step 2: Add your joists Interior joists run perpendicular to your decking boards and typically space 16 inches apart on center. Use joist hangers for secure metal connections rather than just toe-nailing.
Step 3: Add blocking Blocking — short pieces of lumber installed between joists — prevents the frame from racking (shifting side to side) over time.
Section 6: Laying the Deck Boards — The Satisfying Part
This is the part that makes it feel real. After a day of prep and framing, running your first deck board across the frame and screwing it down is genuinely satisfying.
Tips for laying boards:
- Leave a 1/8″ gap between boards to allow for expansion and drainage. A nail or a small spacer tool works well for this.
- Pre-drill near board ends to prevent splitting, especially in cedar or pine.
- Start from the house (or the most visible edge) and work outward. That way any cut boards end up at the back where they’re less visible.
- Check for square frequently — after every 5–6 boards, measure diagonally from corner to corner. Both measurements should match.
- Use hidden fasteners if your budget allows — they give a cleaner look with no visible screw heads.
Let the boards run a little long over the edge, then snap a chalk line and cut them flush at the end. This gives you cleaner, more consistent edges than trying to cut each board to exact length before installation.
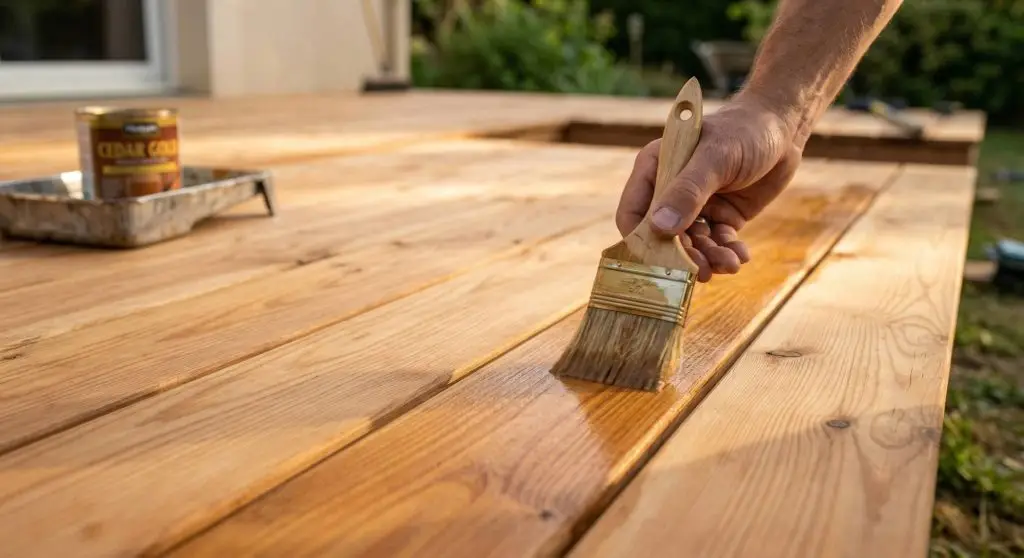
Section 7: Finishing and Sealing — Protecting Your Investment
Once all boards are down and the edges are trimmed, sand any rough spots — especially if you have kids or bare feet in the picture — and apply your finish.
For pressure-treated pine: Wait at least 3–6 months after installation before staining. Fresh pressure-treated wood repels most finishes. Do the water bead test: if water beads up, the wood isn’t ready yet.
For cedar: Apply a penetrating oil or semi-transparent stain within the first few weeks to protect the color.
For composite: Just clean it. No sealing needed.
I used a semi-transparent warm cedar stain on mine and it looked incredible for the first two springs. Now I’m due for a recoat, which is just a weekend afternoon of work.
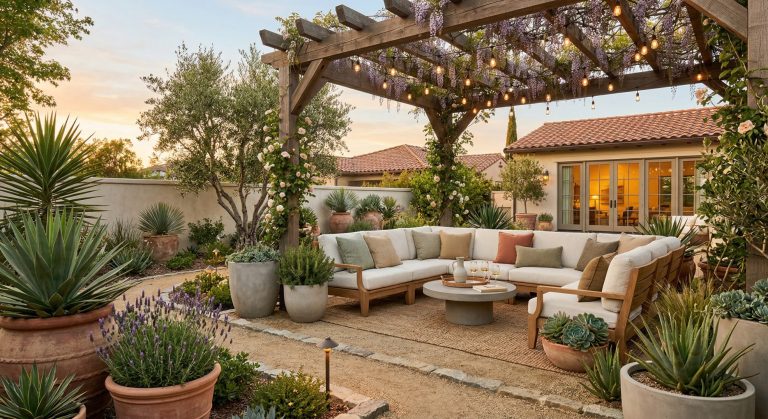
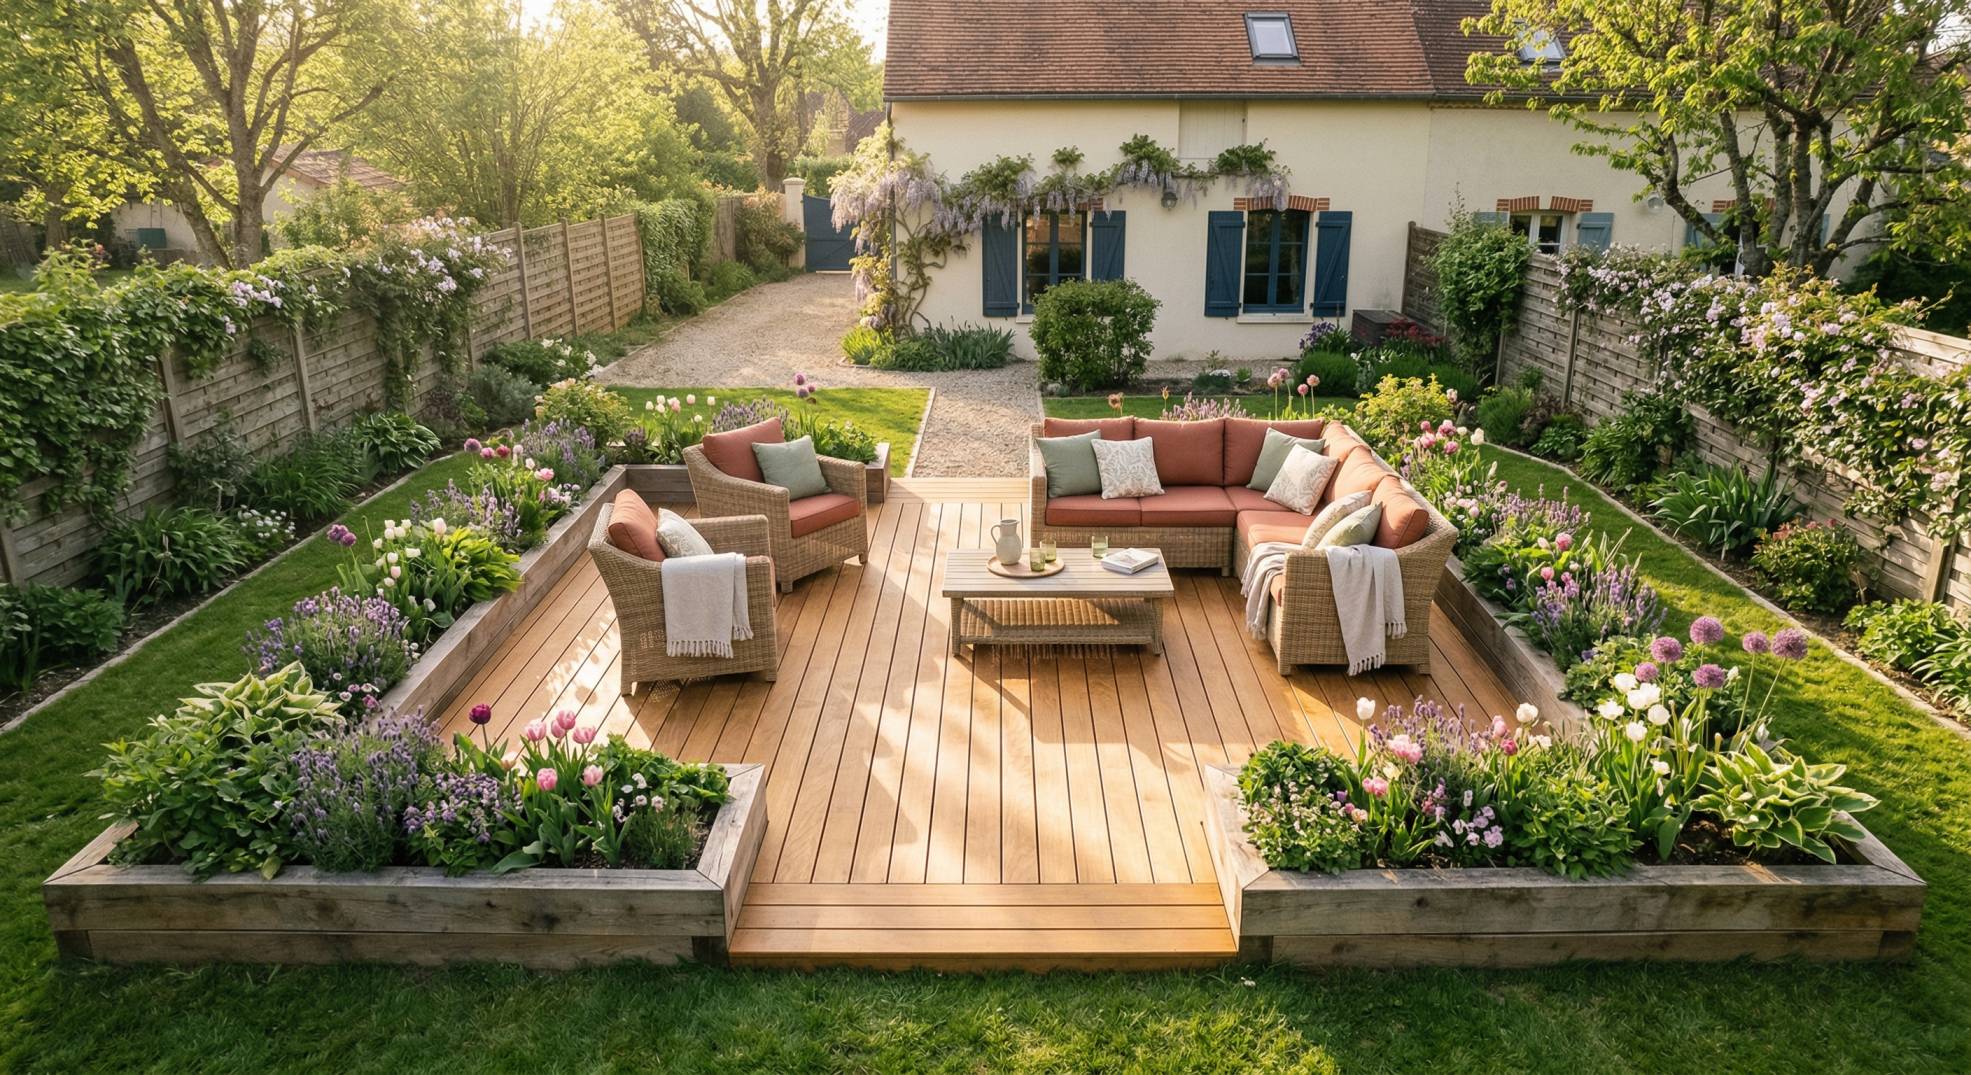
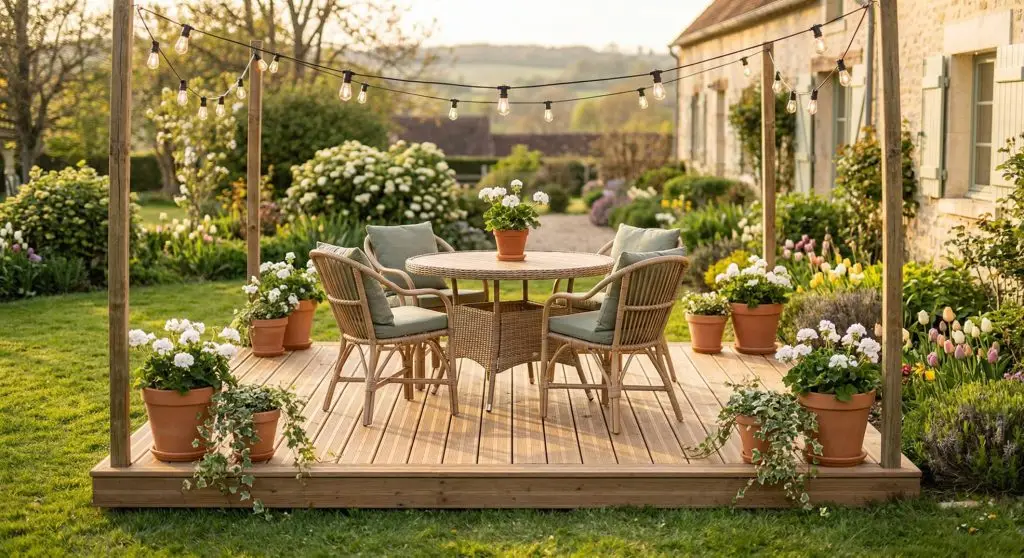
Section 8: Styling Your Low Deck for Spring
This is honestly my favorite part — turning a raw wood platform into an actual outdoor room.
What worked for my low deck spring styling:
- Outdoor rug — Since the deck sits low, an outdoor rug grounds the furniture arrangement and adds color without raising the visual height. I chose a natural jute-look synthetic that could handle rain.
- Container garden at the edges — A row of terracotta pots with trailing plants softens the line where the deck meets the lawn. In spring I plant cascading petunias and sweet potato vine.
- String lights on posts — Two simple wooden 4×4 posts set in the ground at the deck corners let me string lights without attaching anything permanent to the deck. It creates the coziest atmosphere after dark.
- A mix of seating — I have one small dining table on one end and two low lounge chairs on the other. That dual-zone setup means the deck works for meals and for just sitting.
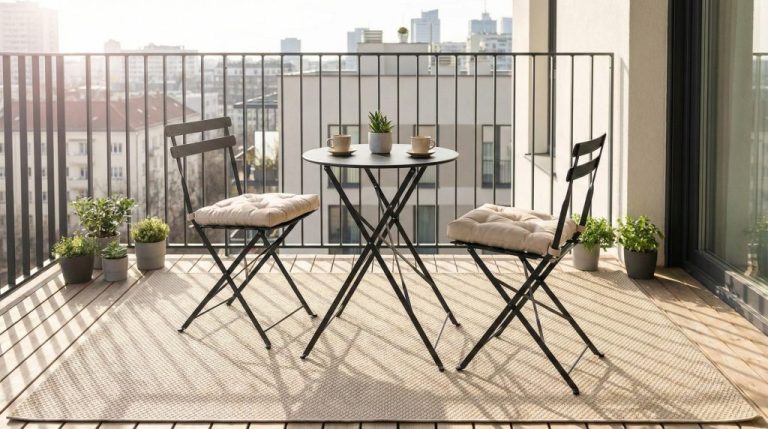
If you’re thinking about the overall feel of your outdoor space, this pairs really well with what I’ve been doing in the rest of my yard. I wrote more about creating a luxurious but low-maintenance feel in Backyard Oasis Ideas for Spring: Low-Maintenance, Water-Wise Upgrades That Feel Luxurious, and if your front yard needs some love too, check out Spring Front Porch Refresh: Easy Decor Ideas with Planters, Rugs & Solar Lights for some quick wins.
Section 9: Common Mistakes to Avoid
I’ve built one deck and helped a neighbor with his. Between the two, I’ve made enough mistakes to give you a solid list.
Don’t skip the drainage prep. Water pooling under your deck is the number one cause of premature rot. Gravel, slope, and landscape fabric are not optional.
Don’t use the wrong fasteners. Regular steel screws will rust and stain your deck. Always use exterior-rated coated screws or stainless steel.
Don’t ignore local codes. Most low decks don’t need permits, but “most” isn’t “all.” A quick call to your local building department takes five minutes and saves potential headaches.
Don’t build too close to dense shade. A deck under a heavy tree canopy stays damp and grows mildew. Some shade is great; a cave is not.
Don’t over-tighten deck screws. Countersink them slightly but don’t crush the wood fibers. Over-tightened screws crack boards and create water traps.
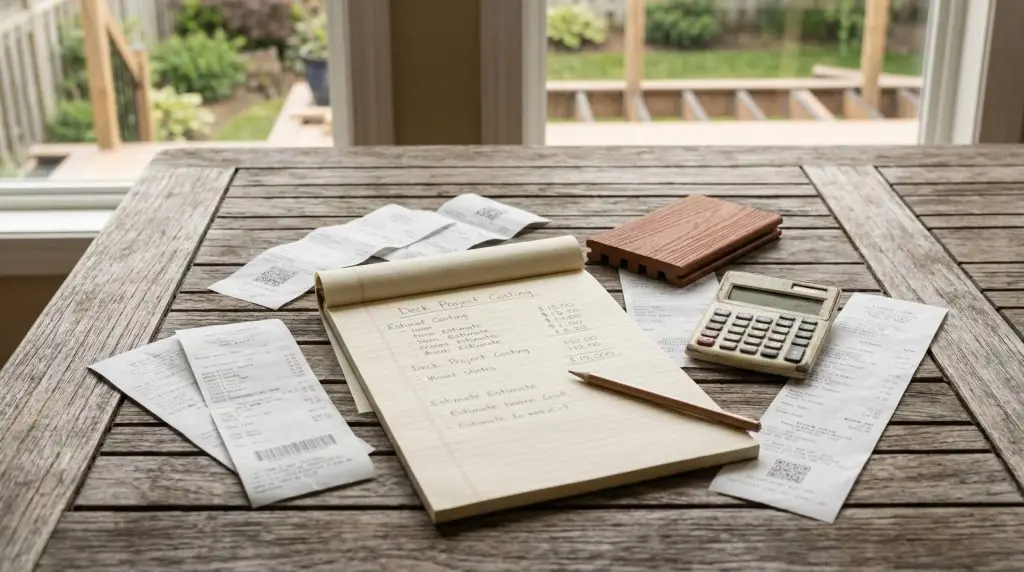
Section 10: Budget Breakdown — What to Expect
For a 12×14 pressure-treated pine deck (168 sq ft), here’s a realistic rough estimate:
| Item | Estimated Cost |
|---|---|
| Pressure-treated lumber (frame) | $150–$250 |
| Decking boards (pine) | $250–$400 |
| Concrete deck blocks (12–16) | $60–$100 |
| Hardware (screws, hangers, brackets) | $60–$90 |
| Landscape fabric + gravel | $40–$70 |
| Stain/sealer | $40–$80 |
| Total (DIY) | $600–$1,000 |
Upgrading to cedar adds roughly $200–$400. Composite decking boards can double the surface material cost, but you eliminate ongoing staining costs.
Tips for Long-Term Success
- Clean your deck twice a year — spring and fall — with a deck wash solution to prevent mildew and grime buildup.
- Reapply stain every 2–3 years for wood decks. Look for fading or graying as your signal.
- Check your footings after the first winter — freeze/thaw cycles can shift things. A quick level check in spring takes two minutes.
- Don’t let potted plants sit directly on wood long-term — use pot feet or saucers with drainage to prevent moisture rings and rot spots.
- Trim back plants at the edges so roots don’t creep under the deck and lift the frame over time.
Conclusion
Here’s the honest truth: this project sat on my to-do list for almost two full years before I actually started it. I kept thinking it was too complicated, that I needed more skills or tools, or that the yard wasn’t ready. Then I spent a weekend actually doing it, and I couldn’t believe I’d waited so long.
A low deck isn’t glamorous to build. It’s measuring, digging, leveling, and screwing things together. But once it’s done? Once you put a table and a couple of chairs on it, set some plants around the edges, and sit there on a spring evening with a drink in your hand while the garden fills in around you — it feels like you’ve unlocked a completely different version of your backyard.
Mine isn’t perfect. One end is about a quarter inch out of level. A couple of boards have small cracks from my first summer. I probably should have gone two feet wider. But none of that matters when I’m out there on a Saturday morning with coffee, watching the tomatoes grow, and actually using the outdoor space I’ve been paying a mortgage on for years.
If you’ve been putting this off, this spring is the time. Start with the planning, figure out your budget, and just start digging.
FAQ
How long does it take to build a low deck?
A 12×14 low deck typically takes 2–3 weekends for a solo DIYer — one for ground prep and framing, one for decking boards, and a third for finishing and styling. If you have a helper, you can cut that in half.
Do I need a permit for a ground-level deck?
In most municipalities, decks under 30 inches from the ground don’t require a permit, especially floating/freestanding decks that aren’t attached to the house. That said, local codes vary — always check before you build.
What is the best wood for a low deck close to the ground?
Pressure-treated pine is the most budget-friendly and has good rot resistance. Cedar is a premium option that looks beautiful and resists decay naturally. Composite decking is the lowest maintenance option and performs very well near the soil.
Can I build a low deck on uneven ground?
Yes — in fact, low decks handle slightly uneven ground better than many people expect. You adjust the height of individual concrete deck blocks during framing to bring everything level. Significant slopes may need some grading first.
How do I keep weeds from growing through my low deck?
A layer of landscape fabric beneath the gravel base prevents most weed growth. Some weeds may still push through gaps in boards over time — a targeted application of a non-selective herbicide at the edges a few times per season keeps it manageable.
What is the most important step in building a low deck?
Ground preparation. It’s the least satisfying part and the easiest to rush, but proper drainage and leveling beneath the deck determines how long it lasts and how solid it feels underfoot.