How to Prepare Your Garden for Spring: Soil, Pruning, Planting + Easy Decor Touches
Hook: In this post you’ll get…
A simple, do-this-next checklist for spring garden prep—without guessing. You’ll learn how to wake up your soil, prune confidently, plant at the right time, and finish with easy decor touches that make your yard feel instantly more inviting.
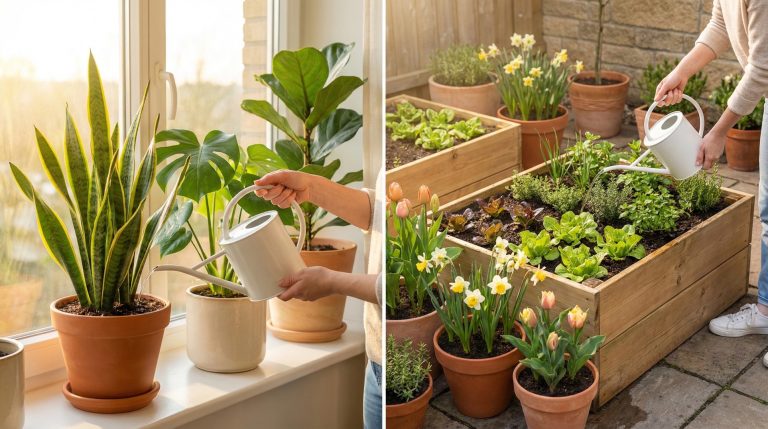
If you also want to dial in watering once your plants start growing, read: How Often to Water Plants in Spring (Indoor & Outdoor Simple Guide).
And if you’re refreshing the patio too, you’ll love: Cozy Outdoor Seating Ideas for Small Spaces: Smart Layouts, Stylish Furniture & Expert Tips.
Quick wins you can do today (5–10 minutes each)
- Walk your garden and note what survived winter and what didn’t.
- Clear sticks and leaves from beds (leave a small “wild corner” if you can).
- Check drainage: water puddling for more than an hour = fix needed.
- Add a 1–2 inch top layer of compost to beds (no digging required).
- Clean and sharpen pruners for cleaner cuts and healthier plants.
- Put a fresh layer of mulch on pathways to instantly “tidy up” the space.
- Start a simple plant map on paper so you don’t overbuy seedlings.
- Wash pots and trays with soapy water to prevent disease carryover.
- Place a birdbath or shallow water dish—small change, big life in the garden.
Step-by-step sections with photos
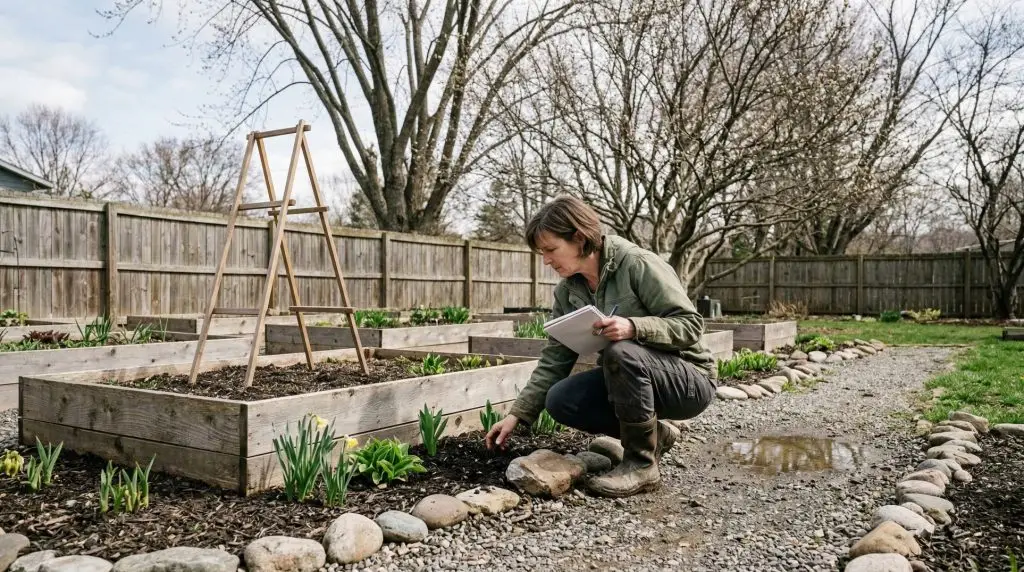
Step 1: Do a spring garden “reset” walk-through
Before you touch a shovel, take 10 minutes to look—really look. Winter can hide problems that become headaches later. Bring a notebook (or your phone) and check these areas:
What to look for
- Drainage trouble: soggy spots, algae, compacted soil, water pooling.
- Frost damage: split bark, blackened stems, mushy crowns on perennials.
- Pest signs: chewed stems, tunnels, tiny egg clusters under leaves.
- Hardscape safety: loose pavers, wobbly trellises, leaning stakes.
- Sun patterns: trees leaf out and shade shifts—note new shadows.
Quick reset tasks
- Remove dead annuals and broken stems.
- Rake gently around perennials (avoid ripping up emerging shoots).
- Reset edging and stakes now, before plants fill in.
Pro tip: If you’re unsure whether a stem is alive, do the “scratch test.” Lightly scratch the bark with a fingernail: green underneath usually means it’s living tissue.
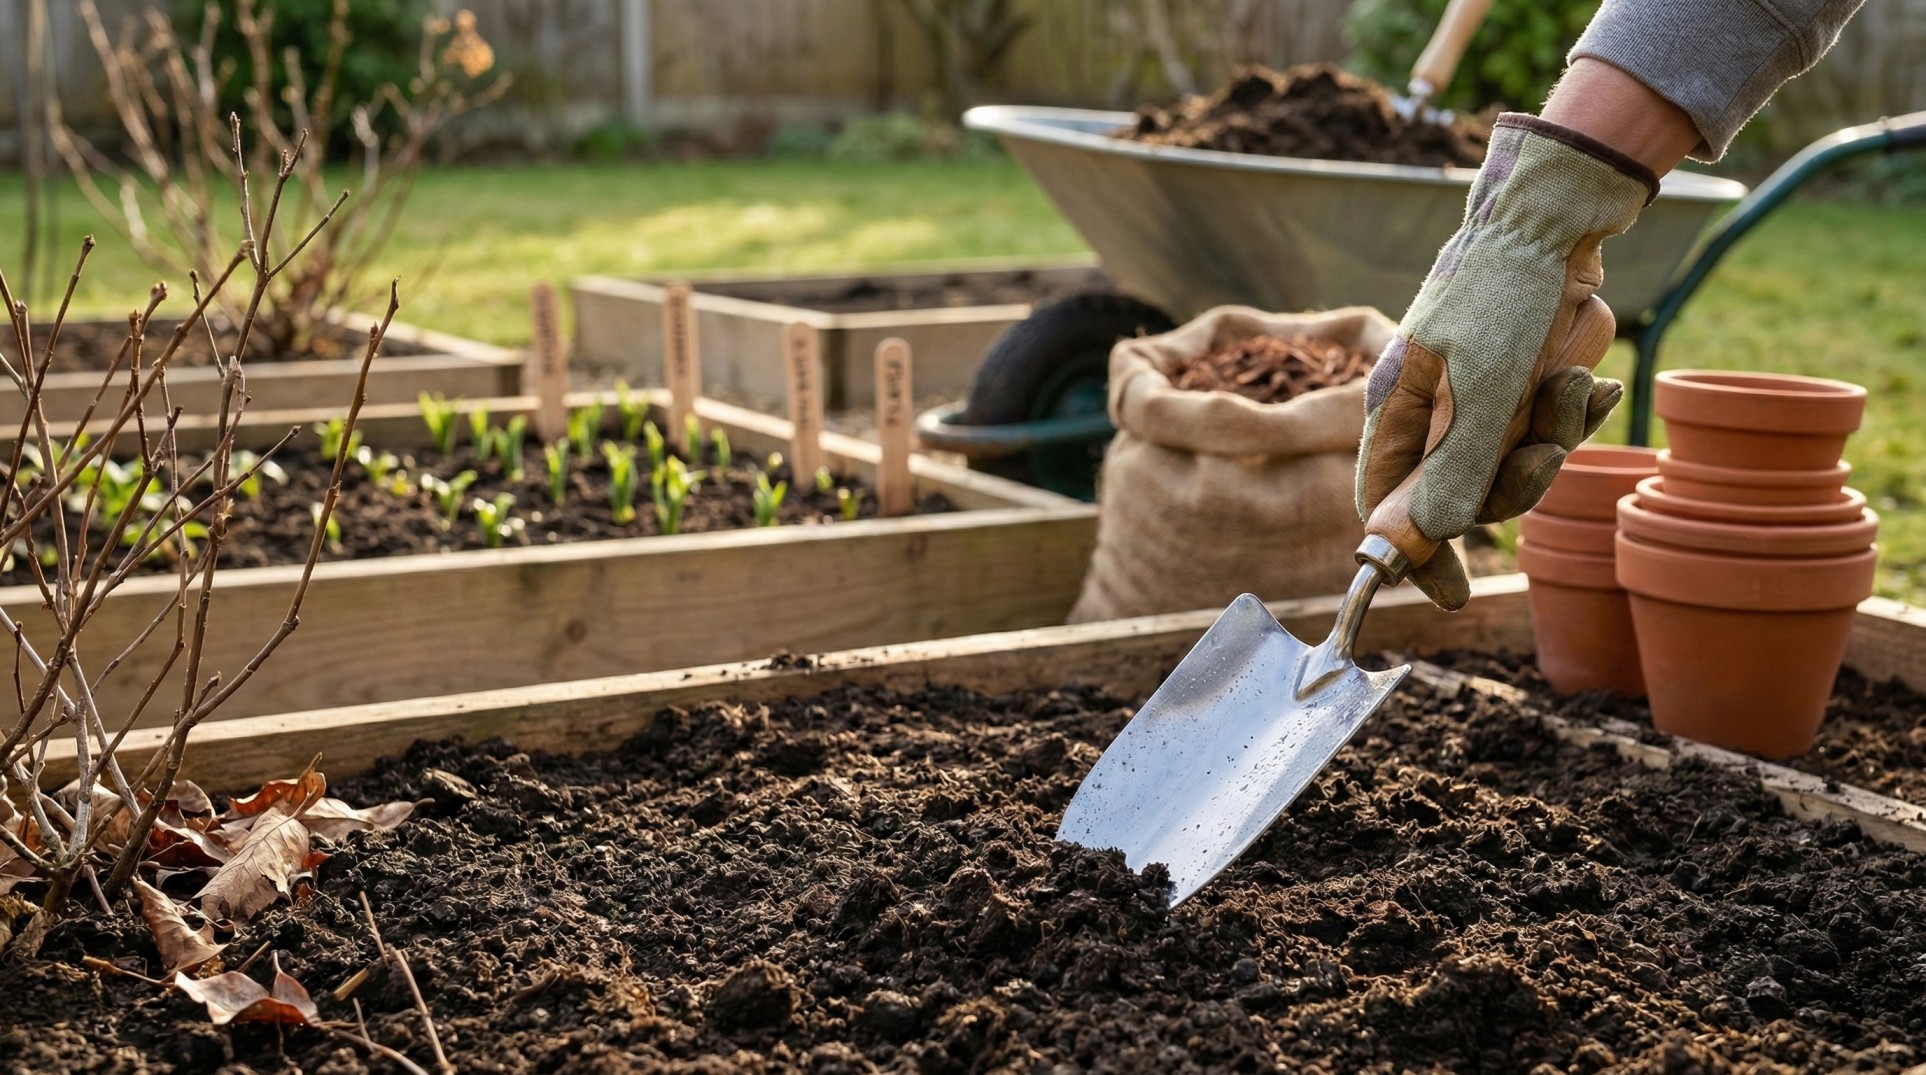
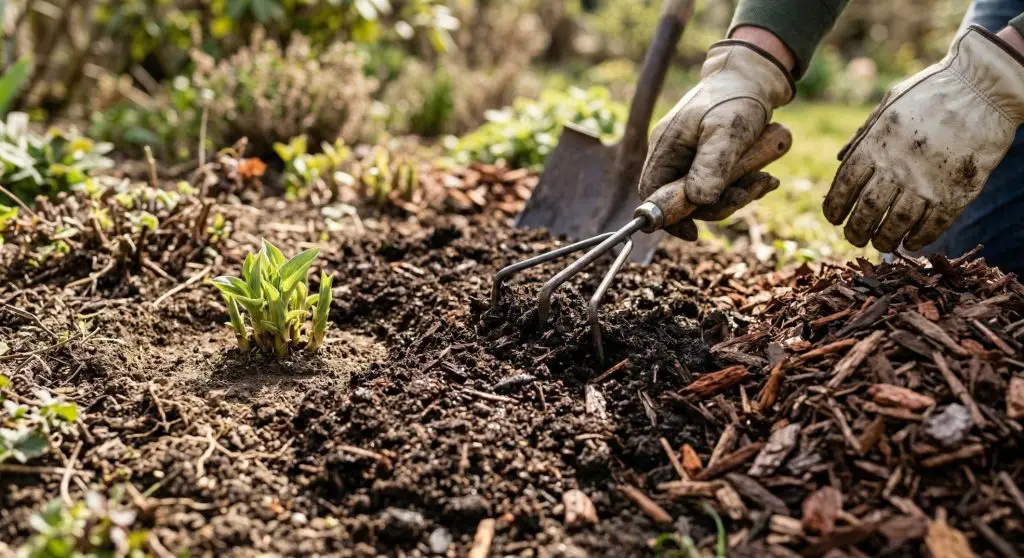
Step 2: Soil prep that actually works (and doesn’t exhaust you)
Healthy spring growth starts below ground. The goal isn’t to “flip” your entire garden—your goal is to feed the soil ecosystem and improve structure so roots can breathe, drink, and expand.
A. Check your soil in 3 minutes
Grab a handful of damp (not soggy) soil:
- Sandy soil falls apart and feels gritty → needs compost and mulch to hold moisture.
- Clay soil forms a sticky ribbon and compacts → needs compost and aeration, not heavy digging when wet.
- Loamy soil crumbles nicely → keep it stable with compost and mulch.
If you want to go a step further, use an inexpensive soil test kit (pH + NPK). Many kits and meters can be found on Amazon or other retailers.
B. Add compost first, always
Compost is the simplest, most universal upgrade:
- Spread 1–2 inches over beds (and around perennials).
- For new beds, you can mix it into the top few inches—but it’s not required.
No compost? Use worm castings, well-rotted manure, or a quality bagged compost. (Avoid fresh manure in spring beds.)
C. Fix compaction without wrecking your back
If soil is hard as a brick, skip double-digging. Try:
- Broadfork or garden fork: insert, rock gently, lift slightly—done.
- Top with compost and mulch to keep it from re-compacting.
D. Mulch smarter (not thicker)
Mulch helps moisture, suppresses weeds, and makes beds look finished:
- 2–3 inches is a sweet spot for most beds.
- Keep mulch 2–3 inches away from plant stems to prevent rot.
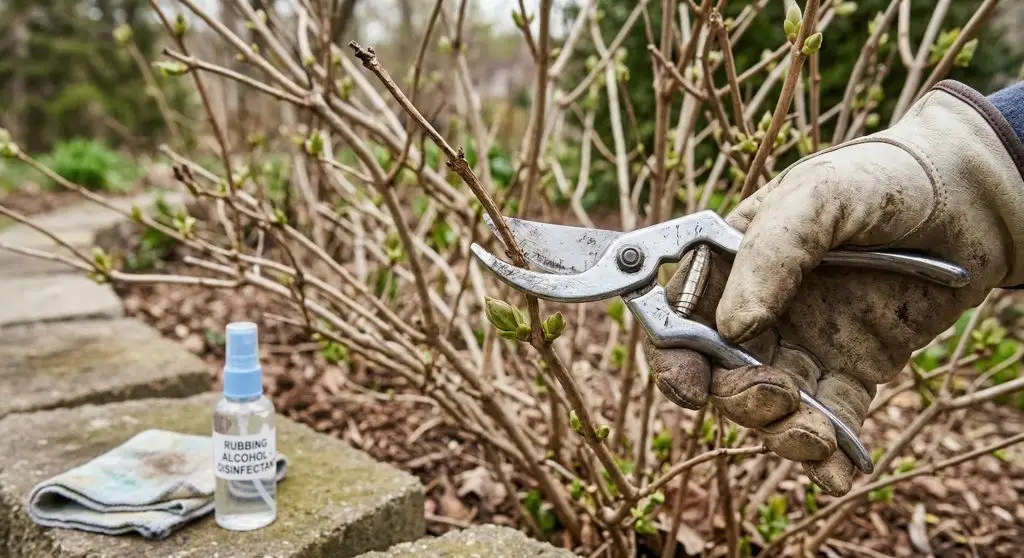
Step 3: Pruning in spring—what to cut, what to leave, and why
Pruning can feel intimidating, but you don’t need to be a horticulturist to do it well. The key is timing and knowing which plants dislike early cuts.
The spring pruning rule of thumb
- Remove dead, damaged, diseased wood first—always safe.
- Shape second—only if needed.
- Don’t “shear everything”—many plants bloom on old wood.
What you can usually prune in early spring
- Roses (many types): remove dead canes, open the center for airflow.
- Ornamental grasses: cut last year’s growth down before new blades get tall.
- Summer-blooming shrubs: like many hydrangeas that bloom on new wood (variety matters), butterfly bush, etc.
- Fruit trees: often pruned in late winter/early spring depending on region.
What to pause on (common mistakes)
- Spring-flowering shrubs (lilac, forsythia, many azaleas): prune after they bloom or you may remove flower buds.
- Lavender: avoid hard cuts into old woody stems (light shaping is safer).
- Bleeding heart and similar perennials: let them emerge; remove dead bits gently later.
Make cleaner cuts
- Use sharp bypass pruners for live stems and loppers for thicker branches.
- Cut at a slight angle just above an outward-facing bud.
- Disinfect tools between diseased plants (rubbing alcohol works).
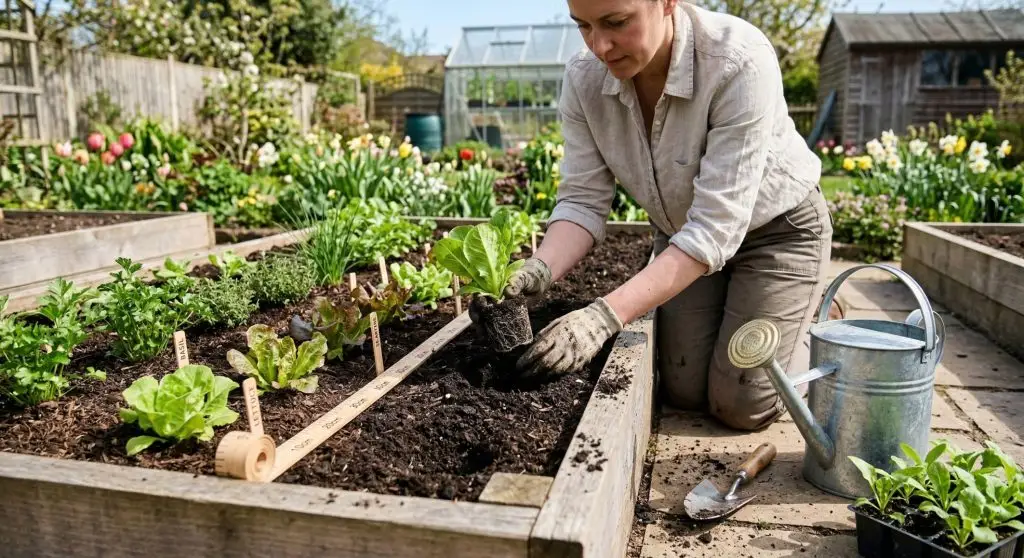
Step 4: Planting plan—what to plant first and how to set yourself up for success
Spring planting goes best when you plant in waves. That way, a cold snap (or surprise heat) doesn’t wipe out everything at once.
A. Start with structure: beds, paths, and supports
Before planting, handle:
- Trellises and tomato cages (install now, not when plants are big).
- Border edging (keeps mulch tidy).
- Irrigation basics (even a simple hose splitter helps).
B. Plant in 3 waves
Wave 1: Cool-season hardy plants
Great for early spring: peas, spinach, lettuce, radishes, carrots, kale, cilantro, and many hardy annual flowers.
Wave 2: Mid-spring staples
Potatoes, beets, chard, more herbs, and many perennials.
Wave 3: Warm-season plants (after frost risk)
Tomatoes, peppers, cucumbers, basil, beans, squash—these hate cold soil.
C. The easiest planting method for healthy roots
- Dig a hole as deep as the root ball and 2–3x wider.
- Loosen the sides of the hole so roots can expand.
- Set the plant at the correct depth (most plants don’t want their crown buried).
- Water in slowly to remove air pockets.
D. Don’t forget spacing (it prevents disease)
Crowded plants stay damp and invite mildew. When in doubt, give each plant a little more room than you think—your future self will thank you.
Step 5: Weed prevention that doesn’t take over your weekends
Weeds are easiest when they’re tiny. Spring is the moment to win the season.
A. The “two-layer” method
- Compost (feeds soil)
- Mulch (blocks light and keeps moisture)
This combo smothers many weed seeds before they germinate.
B. Hand-pull after rain
After a light rain, weeds slide out with roots intact. Keep a small bucket and do 5 minutes at a time.
C. Consider edging and pathways
A crisp path instantly makes a garden look maintained, even if beds are still waking up. Add:
- Mulch or gravel pathways
- Simple metal or plastic edging
These are easy to find on Amazon or other retailers, or locally at garden centers.
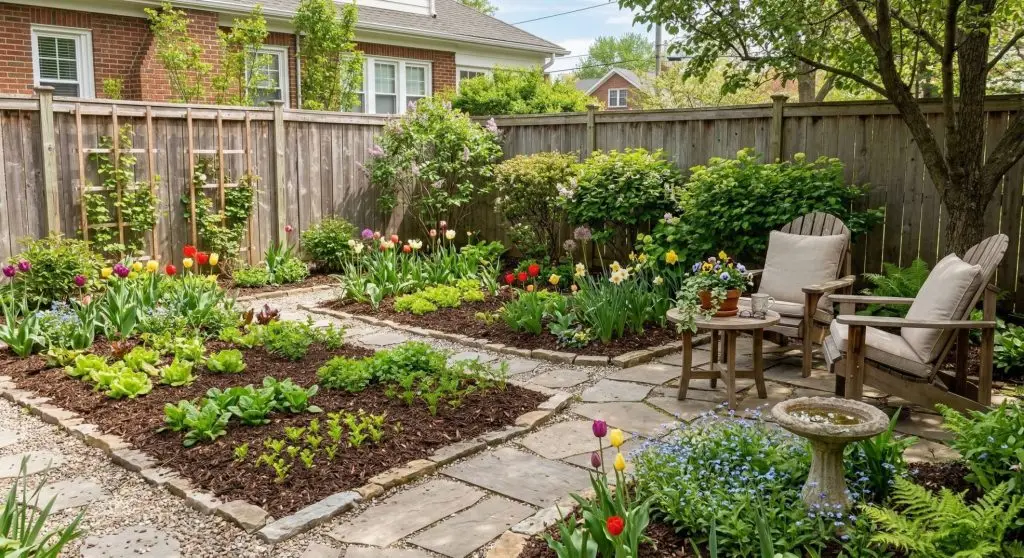
Step 6: Easy spring decor touches that make the garden feel “done”
Decor doesn’t have to be expensive or fussy. Think of it as adding a few anchors that draw the eye while plants fill in.
1) Refresh containers at the entrance
A matching pair of pots (or even two similar ones) creates instant polish. Try:
- One evergreen or structural plant (like boxwood or a dwarf conifer)
- One seasonal filler (pansies, violas, alyssum)
2) Add one vertical feature
Vertical elements make small gardens feel larger:
- Simple trellis with sweet peas
- Bamboo teepee for beans
- Wall-mounted planter near the door
3) Lighting that works year-round
Solar path lights or warm string lights add evening magic without wiring. Look for:
- Weather resistance
- Replaceable batteries (if possible)
- Softer, warm-toned light for a cozy feel
4) One “life magnet”
Bring movement into the garden:
- Birdbath, shallow water dish, or a small fountain
- Pollinator-friendly flowers (even one pot helps)

Shopping + tools list (simple, useful, no clutter)
These items can be found on Amazon or other retailers, or locally at garden centers and hardware stores.
Core tools
- Bypass pruners
- Loppers (if you have shrubs/trees)
- Hand trowel + hand fork
- Garden fork (or broadfork for compacted beds)
- Watering can or hose nozzle with gentle shower setting
- Gloves you’ll actually wear
Soil + bed helpers
- Compost (bagged or bulk)
- Mulch (shredded bark, straw, or leaf mold depending on your garden style)
- Soil test kit (optional but helpful)
- Plant labels + waterproof marker
- Twine or soft plant ties
Decor add-ons (pick 1–2)
- Matching planters or a container set
- Simple trellis or obelisk
- Solar path lights or outdoor string lights
- Birdbath or shallow water dish
FAQ: Spring garden prep
When should I start spring garden prep?
Start when your soil is no longer waterlogged and you can walk on it without sinking or leaving deep footprints. You can clean up and plan earlier, but digging wet soil often creates compaction.
Should I till my garden in spring?
Usually, no. Tilling can disrupt soil structure and beneficial organisms. A top-dress of compost plus light aeration with a fork is often enough.
How do I know what’s dead vs dormant?
Use the scratch test on stems: scrape lightly. Green tissue usually means it’s alive. For perennials, wait for consistent warming—some are late risers.
What’s the best thing to add to soil in spring?
Compost is the most broadly useful amendment. It improves structure, supports microbes, and gently adds nutrients without the “burn” risk of stronger fertilizers.
How soon should I water after planting?
Water immediately after planting to settle soil around roots. After that, keep soil evenly moist (not soggy) while plants establish. For a clear watering rhythm, see How Often to Water Plants in Spring (Indoor & Outdoor Simple Guide).
How can I make my garden look better fast, before plants fill in?
Refresh edges, top up mulch on paths, add two containers near the entry, and install one vertical element like a trellis. Small structure changes create an instant “finished” feel.
Conclusion
Spring garden prep doesn’t have to be a massive project. Start with a quick reset walk-through, feed your soil with compost, prune only what’s appropriate, then plant in sensible waves. Finish with a couple of easy decor touches—containers, lighting, a trellis—and your outdoor space will feel fresh long before everything reaches peak growth.
If you’re building a comfortable spot to enjoy the results, continue with Cozy Outdoor Seating Ideas for Small Spaces: Smart Layouts, Stylish Furniture & Expert Tips—it pairs perfectly with a newly refreshed spring garden.